
As we onboard any new IT support partner, one of our security and network assessment tasks is to validate a client’s server and disaster recovery environment.
As part of this assessment, we often find a customer will have a single point of failure with their active directory environment – most small businesses don’t have the resources to afford multiple servers, and often times previous systems administrators will have not had the foresight to follow best practices regarding building server resiliency.
One example of a point of failure with a single-server environment that we see all too often is DNS. In many cases, the Primary Domain Controller (PDC) will serve as the sole internal DNS provider. Meaning, if a power outage occurs, or if a PDC goes down for any reason, the entire office will “lose” internet connectivity – often a costly outage until technical help can arrive!
Many of these clients do, however, have secondary “server”-like devices – NAS units, Linux machines, et cetera. While using these as a “backup” DNS provider is not a best practice, we aim to provide the best tech support we can while utilizing resources a client already has in place – thus saving them money!
In the following, we outline steps to convert a Synology NAS device into a backup DNS server for an Active Directory (Windows Server 2019) environment.
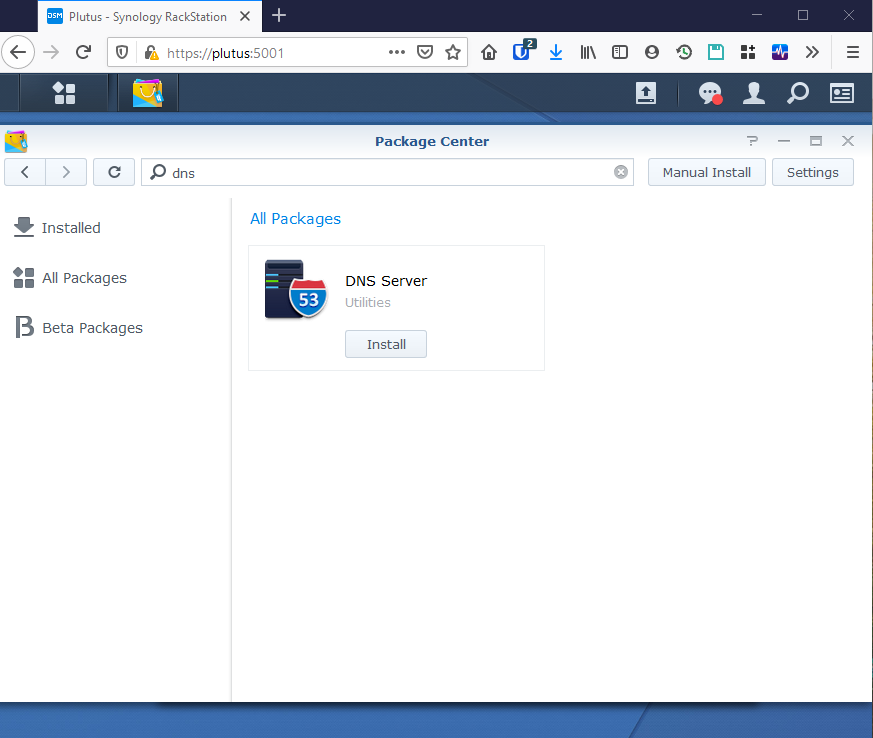
1. Install DNS Package on Synology NAS – straightforward, by opening Package Manager.
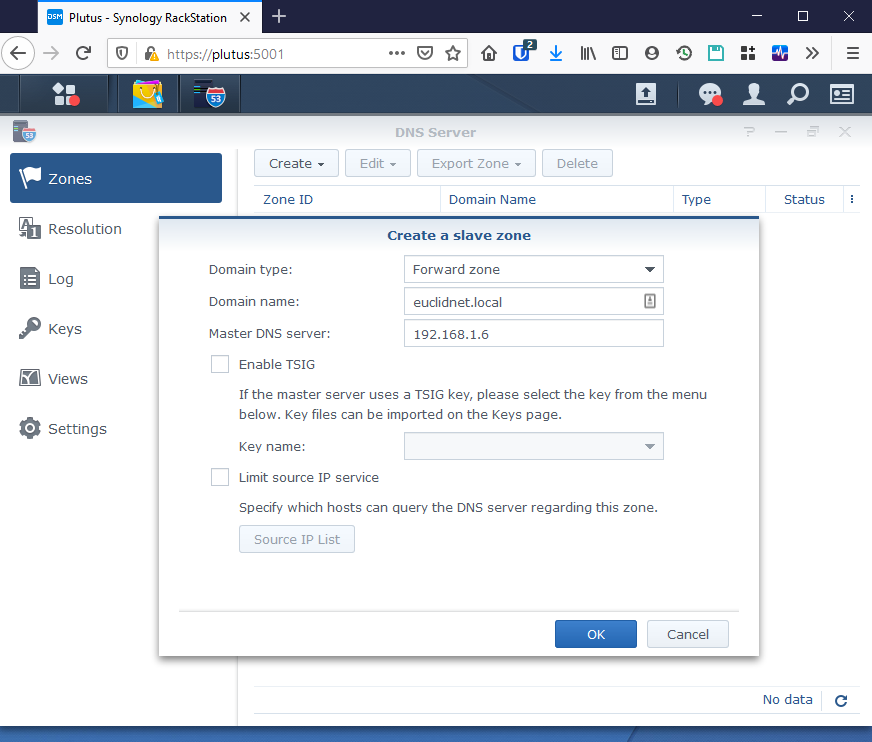
2. Set up a “Slave Zone” – Within Synology’s DNS manager, create a slave zone, set domain type to Forward Lookup Zone, and enter your PDC’s DNS information.
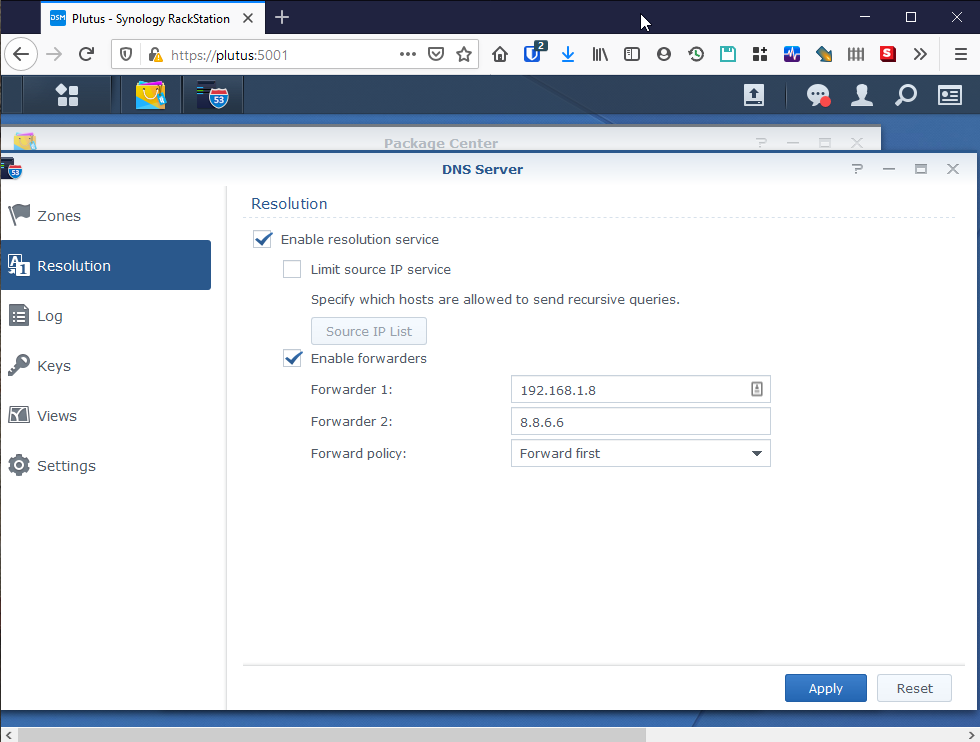
3. Set up DNS Resolution and forwarding on the NAS – In the below, we have enabled the resolution service, and also forwarders. In our lab, we actually do have a backup local DNS server (192.168.1.8 here), but also forward on DNS requests to Google (8.8.8.8/8.8.6.6) to allow for internet connectivity during PDC downtime.
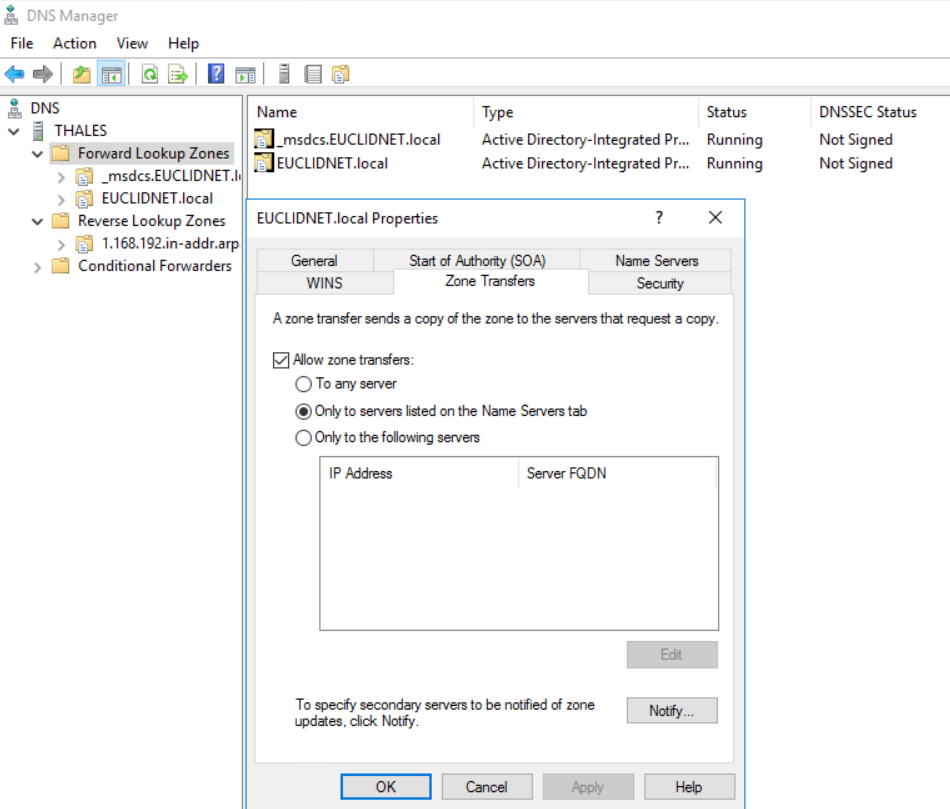
4. Configure DNS Forwarding on PDC – On your server, open DNS, select your AD’s forward lookup zone, open properties.
4.1 Under Zone Transfers, ensure Allow Zone Transfers is enabled, to servers listed in the DNS Tab.
4.2 Under Notify – Ensure the same setting is enabled.
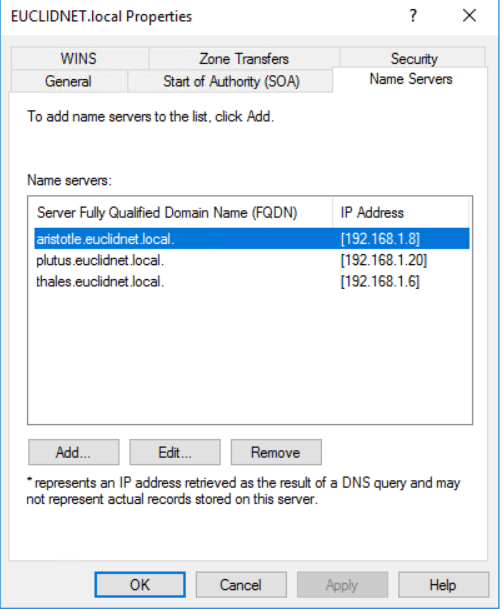
4.3 Add your Slave Name Server to the list of configured name servers. Important – ensure your server validates, with a green check once its FQDN is added.
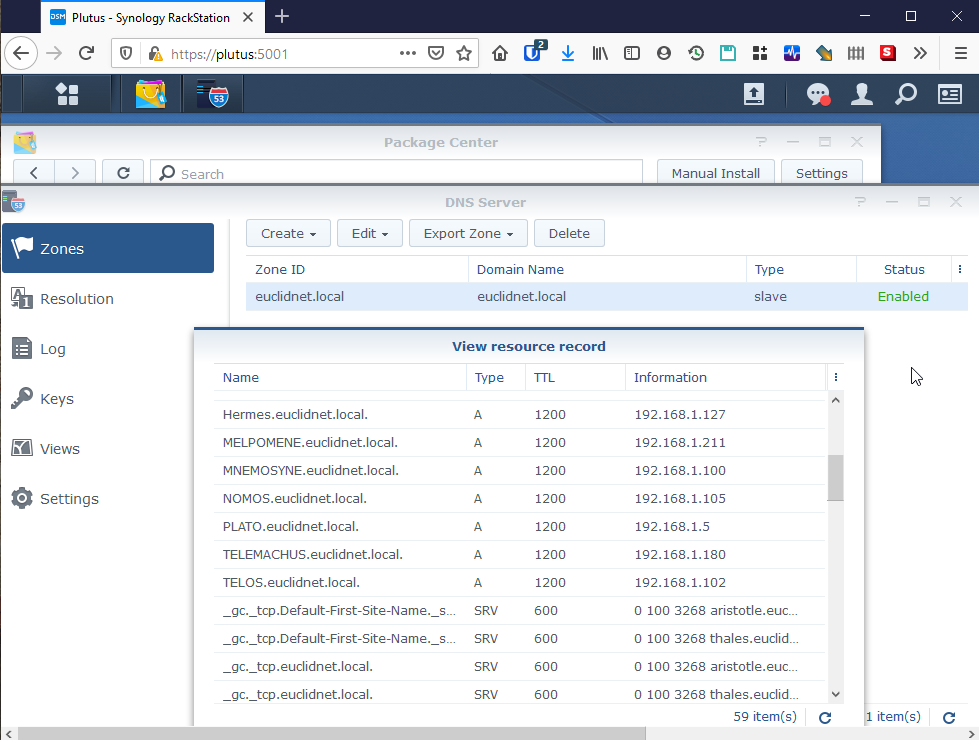
5. Verify DNS records and Zone Transfer has completed – On the Synology DNS Manager, under ‘Zones’, select ‘Edit’ and open ‘Resource Record’ you should find propagated records.
Optional but recommended – repeat steps 2-5 for the Reverse Lookup Zone (EG, 1.168.192.in-addr.arpa) and _msdcs.yourlocal.domain. You *do* have a reverse lookup zone configured, don’t you? =)
6. Add your New DNS Server to DHCP – Don’t forget to configure your DHCP leases to include your new backup DNS server!
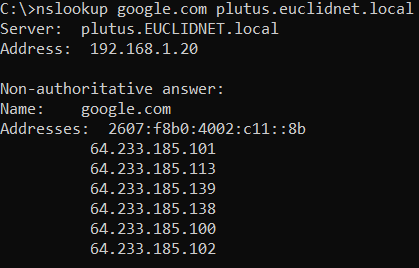
7. Test out DNS resolution – Finally, test your new server to ensure it’s resolving external domain names correctly, and test a failure of your PDC by taking it offline. Success!
If this writeup has been helpful to you, please share your comments below. And as always, if you’re looking for proactive managed IT service in Atlanta, Euclid is here to help!
There are 6 comments. Add yours.